Featured
- Get link
- X
- Other Apps
Simple Pillow Covers - Beginner
Hello! Thank you so much for visiting my blog! This is my first ever blog post, and I am so excited to expand my pattern offerings. I hope you love all the things I have in store for you!
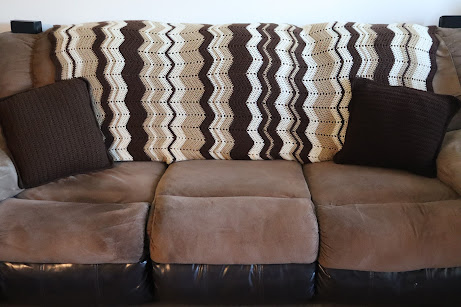
First up, Pillow Covers. This may or may not have been inspired by my actual need for pillow covers. The ones on our couch have been looking a bit worn out and ratty, but are otherwise still usable. No sense throwing them out, right?
I love having simple, modern looking decor. I find busy decor patterns to be a bit stressful, so these simple covers are just perfect. I made mine brown, to match my couch and the chevron blanket that I had made a few years ago. (Leave a comment, if you would like a pattern for that one.)
This pattern is completely adjustable, so you can make it for any size pillow you like. The sample and instructions are for a 16" x 16" pillow. If you have a larger or smaller one, adjusting your starting chain will increase the width of your pillow cover. Adding extra rows will increase the length.
This project is also completely no sew (excluding ends). I understand some things need to be sewn, but I personally love it when a pattern requires no sewing.
Let's move on to the pattern now, shall we?
Click this link to watch the YouTube video tutorial: https://youtu.be/qrFm7_ltwC0
- - - - - - - - - - - - - - - - - - - - - - - - - - - - - - - -
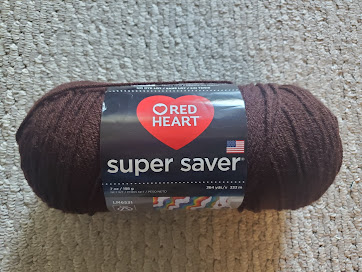
Yarn used: Red Heart Super Saver in Coffee
Hook Size: US size H/5 mm
Approximate Yardage Needed (this will vary, if pattern is adjusted): 450 yds/412 m
Gauge: 14 sts x 10 rows = 4" x 4" (10 cm x 10 cm)
Use this gauge to figure out the starting chain and the amount of rows needed to get your desired width and height. My pillow is 16" x 16", so I multiplied the number of stitches across and the number of rows high by 4 to figure out that I need 56 stitches across and 40 rows high. Multiply them by 3 to get a 12" x 12", by 5 to get a 20" x 20", etc.
Tools/Notions: Yarn Needle for sewing in ends, Scissors
- - - - - - - - - - - - - - - - - - - - - - - - - - - - - - - -
Abbreviations:
ch- chain
hdc- half double crochet
rep- repeat
ss- slip stitch
st(s)- stitch(es)
Special:
hdc through both panels: yarn over, insert hook through the front side of the work, push through the same st on both panels, yarn over, pull through both panels, yarn over, pull through 3 loops on hook
- - - - - - - - - - - - - - - - - - - - - - - - - - - - - - - -
Panels (Make 2)
ch 57 (or number of sts needed + 1)
Row 1: 1 hdc in second ch from hook, 1 hdc in each ch across to end, turn (56 hdc)
Row 2: ch 1 (does not count as a st), 1 hdc in the first st, 1 hdc in each st across to end, turn (56 hdc)
Rows 3-40: Rep Row 2.
Do not cut your yarn after making the second panel. We will use this yarn to crochet the panels together and create a border.
Border
Lay your panels flat together and line them up so the top, sides, and bottom of one panel are lined up with the same of the other panel. The panel with the yarn still attached should be facing you, with the other panel behind it. Working on the side of the panel, each row is considered a st, since there are no actual sts. Make your sts along the side looser, to keep the square shape.
Row 1: ch 1, *1 hdc through both panels in first st and in each st until 1 st remains on side, 3 hdc through both panels in last st of the side, turn work to work the next side,* rep from * to * until end, ss in top of the first st, do not turn (200 hdc)
Row 2: ch 1, *1 hdc in the first st and in each st across the side until the 3 hdc cluster of the previous row, (1 hdc, 3 hdc, 1 hdc) across the cluster of the previous row, turn work to work the next side,* rep from * to * until end, ss in top of the first st (208 hdc)
Cut yarn and sew in ends.
Thank you so much! I hope you enjoy your pillow!
If you make this pattern and post it on social media, please tag me, so I can see your work!
- Get link
- X
- Other Apps


Comments
Post a Comment